Monday 27 February 2012

10 - Sails, and a bit of Rigging

Without benefit of assembly instructions - or any prior experience in building model ships, for that matter - I have been thinking about how to commence the assembly phase of this build, particularly when it came to the rigging. One of the articles I've read recommended installing the standing (black) rigging first, and then the running (white) rigging - assuming, of course, that you've already installed the masts and other related hardware.

However, I was a little reluctant to permanently install the masts, only to encounter a mistake or an omission and then have to try and correct my error. Also, anticipate that it's easier to work on the deck furniture without the added complication of booms and rigging in the way. Consequently, I've decided to mount the main and fore masts in a temporary "deck" (actually a short piece a 2x4) and install as many of the sails and associated rigging as possible before proceeding to other matters. Once I'm satisfied with the result, it will be a relatively simple matter (I hope) to move the completed mast assembly to the actual deck and continue with the rigging.

But before we get to that, a bit of a carry-over from my last post. Besides using the metal rings that I made for attaching the mast hoops to the sails, I also installed them on the three jibs.


After running lengths of standing rigging through the rings, the jibs are ready for installation.

Putting the jibs aside, it was time to install a few blocks for the main and fore sails. It shortly became apparent that my enthusiasm at repeatedly trying to thread the "rope" through the small holes in the blocks would rapidly wane. Fortunately, the holes were large enough that a piece of looped wire could snag the "rope" and pull it through.


This served to speed up the process considerably and this tactic will be useful throughout the build - provided the holes encountered don't get much smaller!

As it turned out, deciding to "mock up" the mast assemblies before permanently installing them was the right choice. When re-working the sails that had come with the original model, I had assumed that their dimensions were accurate to scale and neglected to double-check. This oversight came back to haunt me when I fitted the fore sail to the mast and discovered that it was too long. Trying to make it fit would result in the fore boom being positioned too close to the deck and the lifting blocks would end up touching - not exactly what I had in mind.

Several solutions involving re-sizing the sails were considered and discarded as either too time consuming, or possibly introducing other undesirable issues. The solution arrived at was to merely lengthen the fore mast by about an inch. A length of dowel, machined and bored, did the job, and one of the bands of the fore boom yoke will conceal the joint line. While this will result in a non-scale height for the mast, it will make the final assembly much more acceptable.


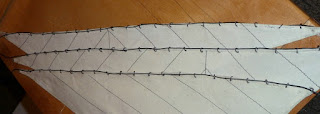
With that distraction out of the way, I could get on with mounting the sails and fitting hardware. Here are is where we are now; this is the fore sail.


Repeat once more for the main sail and then it's on to the top sails.

Pictures in the next post.
       

Sunday 5 February 2012

09 - Sails

Have managed to get the sails pretty well sorted out in the last few days. Portions of this work have taken place at various times almost from the beginning, so this will be a summary of what has transpired to get to this point, which included removal of the original hardware, re-sewing the sails and the installation of more appropriate hardware, etc.

First of all, here is a shot of the original sails that came with the model. I've already removed the brass rings that had served to secure the sails to the masts.


The first order of business was to remove the brass eyelets. Here's a shot of the fore sail, showing how the eyelets detract from any scale appearance.


Once the eyelets were removed, the edge treatment of the sails left quite a bit to be desired, including the black thread edging (not on the full scale sail) and the non-scale appearance of the sewn edge. 


Without going into detail, I fashioned metal rings for all corners of each sail, leaving enough length in each "arm" to allow it to be glued to the sail. A boltrope was also sewn into each edge that would be fastened to a spar (booms or gaffs), or to which metal rings would be secured, either for attaching mast hoops to the sail or for securing the sail directly to standing rigging, eg, the jib to the jib stay.


I also removed the original reef lines from the main and fore sails - again, these were vastly out of scale and too few in number.


As a bit of an aside, there is a need for quite a few metal rings on this model, in various sizes. After making a few individually, I devised a way of essentially mass-producing them. Start with a metal rod of the appropriate size to produce the desired ring diameter - a drill bit serves nicely. Then wrap metal wire around this rod.


Once wrapped, use a cut-off disk on a Dremel tool to slice off the rings.


Repeat several times and you will have enough rings to meet your needs.


Here is a shot of a ring applied to a jib.


The following shots show the results of my efforts to date. Note the changes that I made to the top sails to correctly match the configuration of the full size sails. This is needed in order for the sails to clear the junction of the bottom and top masts. Mast hoops have now been installed on all sails as needed.


The main and fore sails fastened to the respective booms. Note the revised reefing lines.


As a last point, here are close-ups of the main and fore gaffs, again with the sails attached.


Next, I'll try and get the masts sorted.